Photographer Melbourne: Lighting Basics for Evening Fixtures
Evening sports in Melbourne are their own weather system. The sky has already decided to drop out, the venue lights come online with a bit of personality, and suddenly your camera has to translate a chaotic scene into something clean, readable, and emotionally loud. If you shoot sports for long enough, you learn that the “lighting problem” is rarely one problem. It is usually exposure, focus, motion, color temperature, and noise, all arguing with each other at once.
I work a lot with Melbourne sports photography and I still respect how quickly an outdoor fixture can change. One night you are benefiting from a stable overhead lighting layout, the next you are fighting spill light from the scoreboard, a bright patch behind the goal, and clouds that turn hard LEDs into a flatter, lower contrast glow. The basics matter because you are building habits that survive those variations.
Below are the evening lighting foundations I rely on for consistent results, plus the practical decisions that separate decent frames from portfolio images.
The real challenge at night is not “dark,” it’s “inconsistent”
Most photographers new to sports lighting think, “I need more light.” That is part of it, but the bigger issue is that night venues rarely behave like a studio. Even if the average exposure looks fine on your screen, the light often changes across the field.
Common sources of unevenness include:
- stadium lights that create strong directionality, with shadows that move as players move
- reflective surfaces, like damp turf or white boards, that bounce light back toward the camera
- camera placement that puts you near a bright cluster, causing flare or contrast loss
- LED systems that flicker slightly (not always, but often enough to be aware)
When you shoot Melbourne sports photography at evening fixtures, you are effectively photographing under a system, not a single light. Your job is to make your settings and technique adaptable without losing your timing.
Understand your venue lighting before you touch the camera
The fastest way to improve your keeper rate is to treat a venue like it has a mood, then match your approach to that mood.
Before the match starts, do a few quick observations that cost you almost no time:
Look for where the brightest illumination sits. If it is near one end of the field, you can anticipate that players moving toward that end will change contrast and exposure. Then check whether the light is directional or diffuse. Directional lights throw shadows that can either help shape the scene or confuse autofocus if shadows swallow facial detail.
Finally, watch the color temperature. Melbourne venues often mix lighting sources, especially if there is spill from nearby courts or lighting towers. Mixed color can make skin tones go a little greenish or orange, and it can also confuse the “auto white balance” logic in your camera. That matters because sports images live and die by consistent skin tone and readable jerseys.
If you are shooting as a professional sports photographer Melbourne clients expect steadier results, you will usually lock in your white balance strategy early and stick to it.
Exposure strategy: prioritize shutter speed, then manage the rest
For sports photography Melbourne, your exposure settings must protect shutter speed first. At night, the temptation is to chase brightness with a slower shutter, but motion blur is hard to fix later. Players are moving fast, and even small movements like a running arm or head turn can soften details if your shutter drops too far.
What shutter speed is “enough” depends on the sport and your capture style, but I aim for a baseline that keeps action crisp: often around 1/500s for field sports with moderate to fast movement, and higher like 1/800s to 1/1600s if the action is more frantic or if you are shooting tighter portraits with faster gestures. On some nights, the venue lights simply won’t support that without pushing ISO.
So here is the judgment call: accept higher ISO before you accept blur. Noise looks ugly if you overcook it, but a sharp wrong exposure and a blurred correct exposure both hurt your frame. In practice, a slightly noisy image with crisp eyes beats a low ISO smear.
A useful way to think about exposure at night is this:
- Choose shutter speed you can trust for motion
- Choose aperture that gives you enough depth of field
- Let ISO float to meet exposure without wrecking shutter speed
Aperture choices for evening fixtures
Aperture controls depth of field and light, but it also changes how forgiving your focus system is.
Many sports photographers start at night with the widest aperture they have, like f/2.8 or f/1.8, then wonder why backgrounds look messy or why focus feels inconsistent. Wide apertures create a thin plane of acceptable sharpness. When your tracking autofocus hunts even briefly, the sharpness window may be so narrow that the frame misses.
In many evening fixtures, I tend to stay in the “fast but not razor thin” zone, often around f/2.8 to f/4 depending on lens and subject distance. F/4 can be a sweet spot because it buys depth of field while keeping shutter speed achievable with reasonable ISO. If you are working with a long lens and the subject is close to your focal plane, depth of field can collapse quickly, so the “right” aperture depends on how far you are from the action.
If you are covering Melbourne sports photography for consistent editing, having a repeatable aperture range also makes your color and noise management more predictable later.
ISO management without panic
ISO at night is inevitable. The goal is not to keep ISO low at all costs, it is to keep ISO at a level where you still preserve subject detail.
Your camera’s noise performance varies by sensor, but the practical rule I use is simple: if the players are sharp and the jersey text is readable at the intended crop, you are usually fine. If you are applying heavy noise reduction later, you risk turning fine fabric textures into waxy gradients.
Anecdotally, I have seen two nights with “similar exposure” on the camera screen, yet one night’s images hold up better because the lights were steadier and the camera met focus cleanly. In other words, ISO is only half the story. Motion blur and focus misses are what make noise look worse.
When you shoot evenings consistently, the best improvement comes from building an internal tolerance for ISO in exchange for sharpness.
White balance: lock it down and protect skin tone
Auto white balance can be surprisingly unstable under LED stadium lighting. Sometimes it will look correct for the first few minutes, then drift as the scene changes, or as the camera’s exposure changes between light and shadow.
You have three practical approaches:
- Set a fixed Kelvin value (often works well when the venue lighting is consistent)
- Use a controlled preset like “daylight” or “fluorescent,” then adjust in post with a consistent workflow
- Use auto white balance, but be strict in post about correcting skin tone for uniformity
For professional sports photographer Melbourne work, I usually prefer consistent capture settings. Even if you later fine-tune in editing, locking white balance reduces the chance that your batch looks like it was shot under multiple cameras.
If you have to move between ends of the ground and you notice a color shift, the answer is not to constantly change settings mid-match. It is to choose a compromise white balance that matches the majority of your keepers, then correct in post with reference points from consistent jersey and skin.
Focus and tracking in low light: set up your camera for predictability
Low light makes autofocus less forgiving, especially when contrast drops or when backgrounds get bright and distracting. In sports, the target is often moving quickly, partially occluded, and sometimes turning away from your camera at the moment you need the closest sharpness.
So instead of fighting the camera, you guide it.
I recommend setting autofocus behavior before play, then leaving it alone during the match. If your camera offers face or eye detection for sport, treat it as a bonus, not as your main strategy. When athletes are in motion, tracking tends to be more reliable than “instant lock” systems.
The other key is to understand what your focus area is actually doing. If you are using a small single point and the athlete moves off that point during the instant of critical action, you will lose sharpness. Wider area tracking can keep you on target, but it can also jump to high-contrast https://www.australianplanet.com/pure-sport-images-F110BC10318D345#actions elements like scoreboard lights or boundary signage.
At night, a bright light behind players can become an autofocus magnet. That is why your camera position and your angle matter. If possible, avoid placing yourself so that the brightest source sits right where autofocus might decide to hunt.
Metering and exposure compensation: how to stop the camera from being fooled
Metering systems do their best, but sports scenes at night often contain large bright regions. Stadium lights create intense highlights, and there may be dark areas near the sidelines. If your subject is moving from a bright zone to a dark zone, the meter can chase the average and change your exposure from frame to frame.
What I do in practice is rely on modes that keep shutter and aperture where I want them, then use exposure compensation when I see a consistent bias. For example, if the athletes’ kits are dark and the camera is brightening too much, dial in negative compensation. If the background is dark and the camera underexposes, dial in positive compensation.
This is one of those “small decisions” that makes your editing faster. When exposures are consistent, you spend less time rescuing highlights and lifting shadows in bulk.
Motion blur control: timing is everything, but you still need the right settings
Even with the right shutter speed, you can still get blur if you time the shot poorly. Here is what I mean.
If you are capturing a soccer strike, you want the ball contact moment, not the wind-up half second earlier. If you are shooting basketball, you want the frame where the ball and hands align, not the moment where the ball has started its flight and your subject has already spun.
At night, you also tend to shoot with a longer lens. That can magnify your perception of blur. A slightly slower shutter that would be acceptable for a wide shot becomes unacceptable when you zoom in on the action and pixel peep.
The fix is not only shutter speed. It is also anticipating where the athlete will be relative to your focusing system. Sports photography Melbourne is built on anticipation, then discipline: press when you have it.
Color and contrast: LEDs, shadows, and the “clean image” goal
LED stadium lighting can produce a very crisp look, but it can also flatten skin tones if the color rendering is off or if the light is too diffuse. Damp conditions can bounce light back into the camera, reducing contrast and turning the scene a little hazy.
Two practical moves help:
First, watch your angle. If you shoot too straight-on under a bright bank of lights, you can wash the face and turn jerseys into mid gray. Slightly changing position can give you better contrast without changing your settings.
Second, manage highlights. Bright lights and reflective surfaces can clip easily, and clipped highlights are hard to recover. Expose for skin and faces first, and treat the venue lights as a background element, not the subject.
A simple evening setup workflow I trust on match night
You do not need a complicated process, but you do need something repeatable. Here is the workflow I use before play and then adjust only when something changes.
- Check your shutter speed target based on the sport, then decide whether f/2.8, f/3.2, or f/4 best matches your distance to the action.
- Set a baseline ISO cap you are comfortable with, then let the camera run inside that comfort range.
- Lock white balance to a consistent value that matches the venue lighting, then verify on a jersey and a face in the first minutes.
- Choose autofocus tracking settings you trust for moving subjects, and confirm it is not attracted to bright lights behind the play.
- Do one test sequence, then review sharpness on eyes or key details rather than only looking at the exposure slider.
The reason this works is that it forces decisions in the right order. Shutter first. Focus behavior second. White balance early. ISO and exposure follow.
If you are working with Pure Sport Images, the consistency is exactly what you want across a full evening of fixtures. Editors and clients can only grade so much, and your capture choices make their job easier.
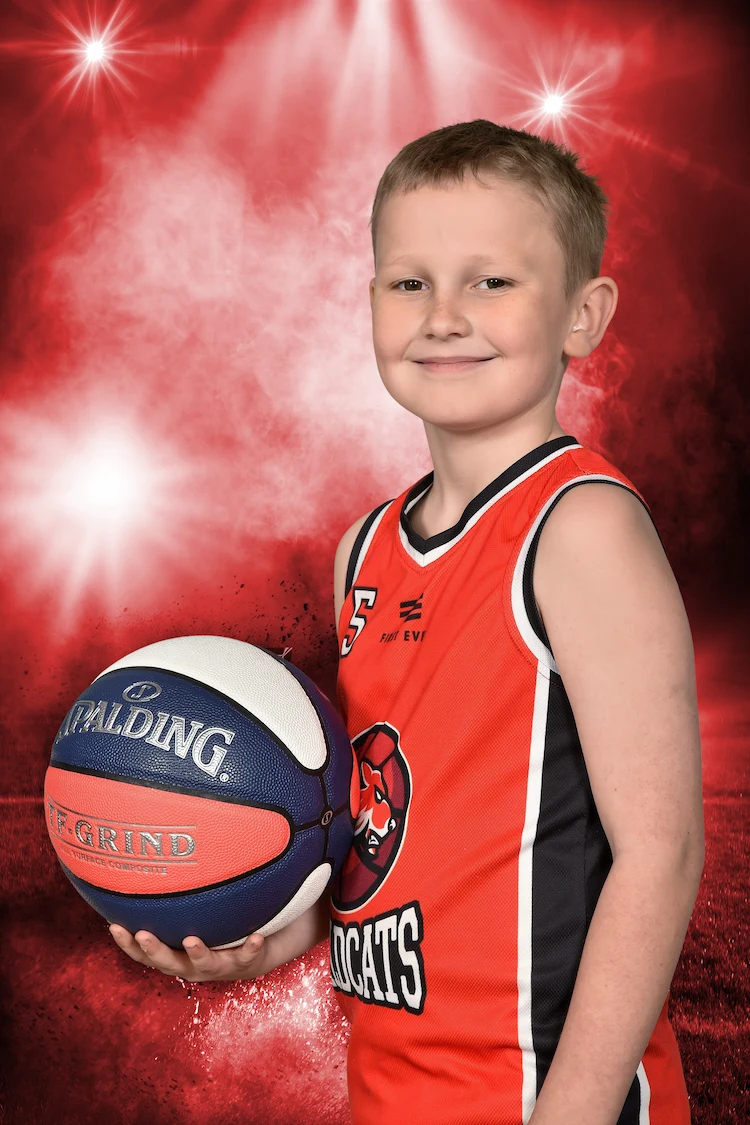
Common evening lighting pitfalls, and what to do instead
Even with good equipment, night venues create a predictable set of problems. The good news is that most of them have practical fixes.
One classic issue is “the bright patch.” If a light bank is stronger at one end, your exposure shifts between halves of the field. The cure is not constant re-metering, it is understanding where the stronger exposure zone lives and setting your baseline to protect faces.
Another is “autofocus jumping.” This happens when a bright object in the background becomes the easier target than the player. The cure is often simple: change your autofocus area strategy, or shift your camera angle so the bright lights do not sit behind the athletes’ heads.
Then there is the “color drift” issue. If you rely professional sports photographer Melbourne on auto white balance, you may see subtle changes across frames that become obvious when you order images. The cure is to lock it down or to commit to a consistent post correction workflow.
Finally, there is the “slow shutter trap.” In evenings, everything looks tempting on screen, especially if your camera’s exposure simulation is good. But sports motion reveals the truth. If you routinely miss sharpness, treat shutter speed as non-negotiable and accept ISO.
Shooting from the sideline: placement affects lighting more than people think
Where you stand can be the difference between a clean portrait of the play and a technically compromised image.
If you can, position yourself so the brightest lights are not directly behind the action. Backlighting can look dramatic, but it can also create flare and silhouette faces. Under some venues, the flare is manageable. Under others, it is relentless.
The same goes for reflecting surfaces. If you sit near a fence that bounces light, the camera can pick up unwanted highlights that reduce jersey readability.
Melbourne sports photography often means navigating fixed barriers, limited access, and crowded sidelines. Even then, small shifts within your permitted space can improve light direction and reduce flare. You do not need a better venue. You need a better angle to the venue.
When the lights are weak: accept the constraints and change your style
Some nights, the venue simply cannot support your ideal settings. That is not a failure. It is information. You adjust your expectations and your shooting style.
If shutter speeds you want are pushing ISO into a range where the noise becomes obvious after cropping, consider changing the frame you pursue. Instead of tight action sequences every time, you might capture moments with slightly slower movement, like tactical hand signals, set plays with brief pauses, or expressions before contact.
It is the same sport, different story.
When you work as a sports photographer Melbourne clients hire for deliverables, you still want consistent coverage, but you may choose wider shots to keep motion blur manageable. Wider shots also give you more contextual lighting cues, which can look great even when the action is fast.
The editing mindset: protect highlights, then control noise
Even with careful exposure and focus, night images can benefit from a disciplined editing approach. Your goal is not to make the image look “bright,” it is to make it look true and clean.
For most evening sports frames, I recommend thinking in this order:
- recover highlight detail carefully (especially around the brightest lights and jerseys near the light sources)
- correct white balance consistently across a set
- apply noise reduction with restraint, protecting skin and fabric texture
- add clarity or sharpening where it helps edges, not where it amplifies artifacts
If you overdo noise reduction, you will lose the micro-contrast that makes sports images feel sharp. If you avoid noise reduction entirely, the image can look grainy and less professional, particularly in shadows.
Consistency is again the theme. When you capture with a predictable approach, your edits become faster and more uniform.
A quick reference: evening lighting do’s that pay off immediately
If you only remember a handful of actions, these are the ones I see transform results quickly on real match nights.
- Choose shutter speed first, prioritize sharpness over keeping ISO “pretty.”
- Lock white balance to avoid drifting color under LED lighting.
- Use autofocus tracking you understand, and watch for background light distractions.
- Expose to protect faces and jersey text, then tame highlights in post.
- Scout your angle early, where possible, so bright sources do not sit behind athletes’ heads.
This is the stuff that makes your images look deliberate, not accidental.
Why this matters for Melbourne sports photography teams and clients
Evening fixtures are demanding because they compress time. You might shoot for hours, then deliver quickly. Clients want consistency across dozens of players and multiple areas of the ground, and editors need your files to behave similarly in terms of brightness and color.
That is why I encourage photographers who operate as photographer Melbourne, sports photographer Melbourne, and professional sports photographer Melbourne to treat lighting as part of the workflow, not an emergency. When you build habits around shutter priority, focus stability, and white balance discipline, the night stops feeling like guesswork.
Pure Sport Images and similar teams succeed because the images are coherent. Lighting choices made at capture time reduce the chaos later. You spend less time fighting technical issues and more time selecting the frames that actually tell the story: the timing, the emotion, the moment the match turns.
Evening lights will always be tricky in Melbourne, but you can absolutely be ready for them. Once your settings and technique follow the same logic every match, the venue becomes just another backdrop, not a threat to your sharpness or your skin tones.
Pure Sport Images
23 Grandview Ave, Mulgrave VIC 3170, Australia
+61 413 157 614
[email protected]
Website: https://puresportimages.com.au/